Some basic terminology
Before starting with the main topic of the article, let’s briefly explain the topics we will be discussing here.
What is a database?
A database is a collection of structured data stored in the form of one or more tables. This is quite similar to e.g. an Excel Worksheet which consists of multiple tabs, each with a table containing different data organising into rows and columns.
Databases are the standard way of storing and accessing large amounts of data and hence extremely common in all forms of software and hardware.
How do people manipulate databases?
There are various ways of accessing and editing databases:
MySQL is the most popular database system. It’s widely used in many database-driven applications, such as Joomla.
phpMyAdmin is the most popular open source tool for accessing and editing MySQL databases. It can be used to view/edit data, to create/restore backups and many other things.
Accessing/adding phpMyAdmin
phpMyAdmin is a PHP-based application which can easily be uploaded to any webspace and then run in your web browser. Since it’s so common, however, many web hosts provide a pre-installed version to save time.
phpMyAdmin with a WebHost
- Open the admin panel of your webhost
- Search for the link to phpMyAdmin (it varies across hosting providers)
- Login with the username and password specified in your admin panel
Install your own phpMyAdmin
- Download phpMyAdmin from the official site
- Extract the .zip file
- Rename config.sample.inc.php to config.inc.php
- Open the file with a text editor and the localhost to the location of your database hostname
$cfg[‘Servers’][$i][‘host’] = ‘localhost’; - Add a ‘Blowfish Secret’
- Create a random string containing 32 characters
- Add a line in the config.inc.php
$cfg[‘blowfish_secret’] = ‘PutTheRandom32CharacterStringHere’; - Upload the folder to your Joomla directory
- Go to the phpMyAdmin URL (usually www.yoursite.com/phpmyadmin)
- Login using your username and password
If you have Joomla installed locally, enabling and accessing phpMyAdmin is a bit different. Check out Developing Joomla locally using Wamp.
Basic usage of phpMyAdmin
Hopefully by now you’ve managed to sign into phpMyAdmin.
Now let’s access your database!
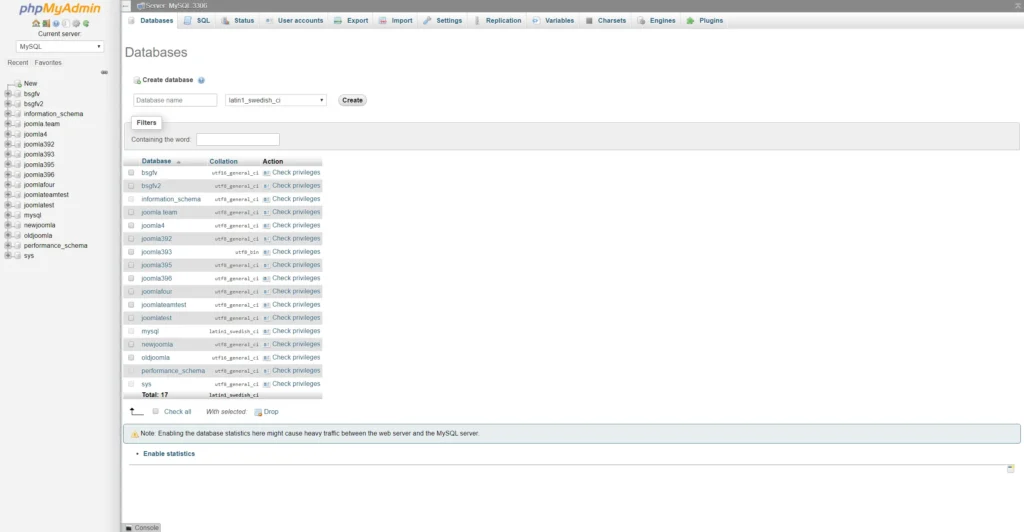
List of databases
Click on the ‘Databases’ tab. This will open a list of the databases in your phpMyAdmin instance.
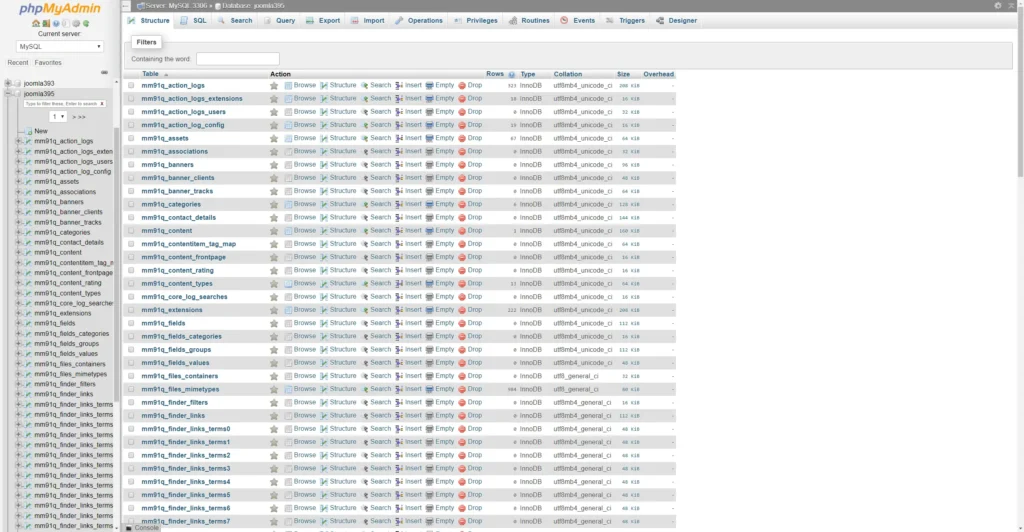
Tables in a database
Upon opening one database, you will see various tables. Each of these tables has a specific purpose. All of them have the same prefix, the one that was setup when installing Joomla. Upon closer inspection, you will most likely realise what some of them do. Let’s open one of the tables and see what it contains.
Opening a table
I have chosen the Joomla Users table. Can you guess which data will be stored here?
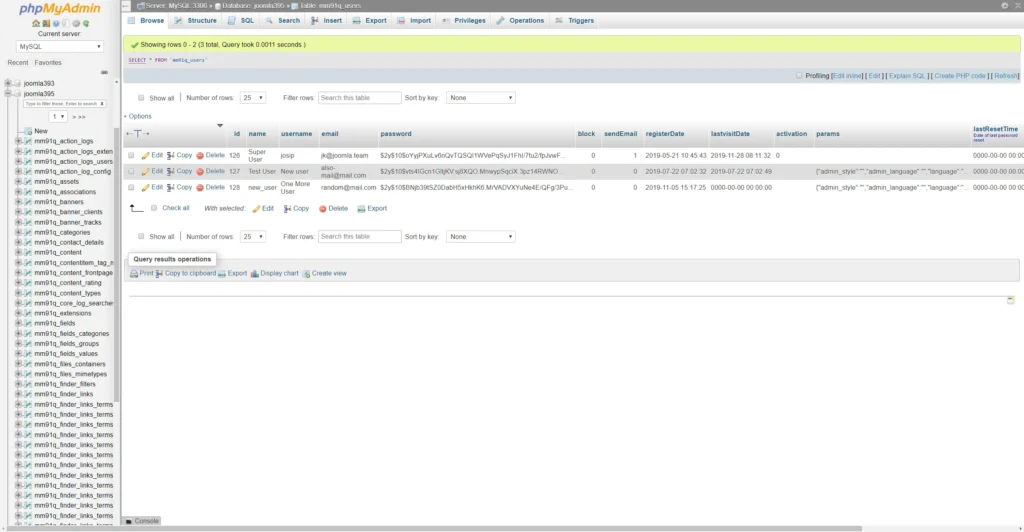
Yep! Here you can find all of the users registered on your Joomla site. Their usernames, emails, dates of registration, dates last visited…even their passwords.
Passwords are hashed so you cannot simply ‘see’ them. Nonetheless, you can modify them so we suggest approaching with caution.
It’s easy to change any value by simply double clicking it. Everything is automated and gets saved the moment you press the Enter key.
Before making any modifications directly in the database, we strongly advise making a backup. Read about Making a backup of your Joomla site.
Backing up (exporting) a database
Backing up your database is an easy and quick procedure. Choose the database you wish to backup and press the ‘Export’ button above.
This will open a window asking you for some additional details.
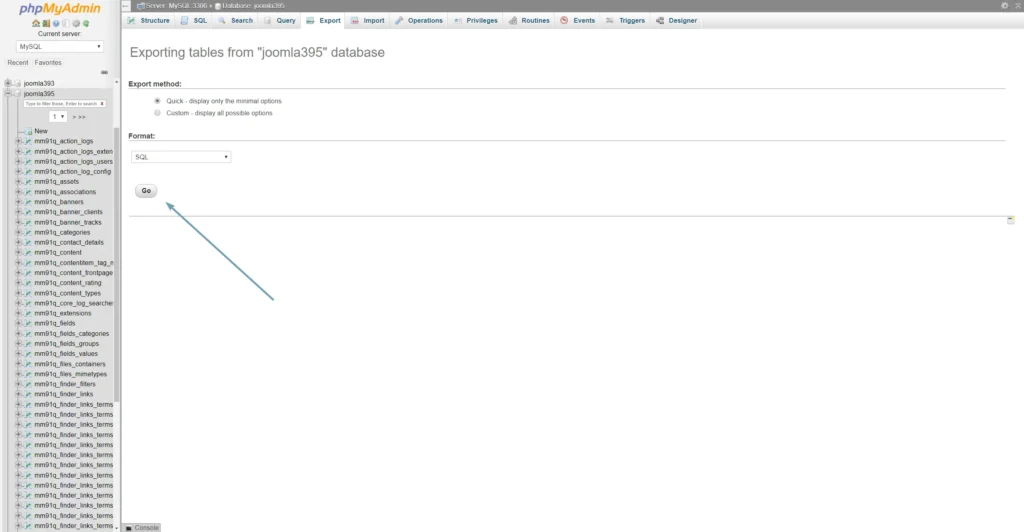
Since we are making a simple backup, there is no need to change anything. Press GO and your database will be downloaded in SQL format.
You have a file which contains your full database. Store it somewhere safe and hopefully you won’t have to use it ever again.
In case you have problems and wish to restore, the procedure is pretty straightforward…
Restoring (importing) my database
If you made a backup like we mentioned previously, the process of restoring is also quite simple.
Clicking the ‘Import’ button will bring you to a window requiring you to choose a .sql file from your computer. You have that file, right?
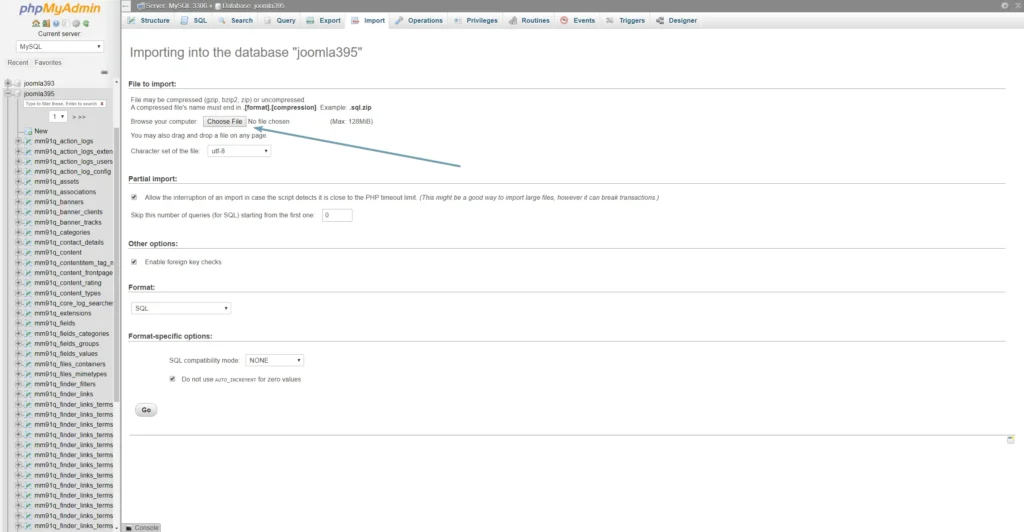
Find the required .sql file and press GO.
After a few moments, you should have a database with the data from the .sql file.
This concludes our article about simple database manipulation using phpMyAdmin.
If you have any problems, feel free to contact us.
We are an international agency that specializes in all things Joomla.
Contact us and we will be sure to help you as quickly as possible.